Search recipes by category

Thursday, January 31, 2013

Roasted Garlic Shrimp


I consider myself a pretty frugal grocery shopper.  I am not an extreme couponer but I do pay attention to how much I spend on groceries.  I save money by buying grocery store brand staples like cereals and granola bars but I spend a little more to get the freshest meats and seafood that I possibly can.  It's all about figuring out what is most important to me and my family.  When it comes to shrimp, I never buy the precooked, but I do look for shrimp that has already been deviened and butterflied.  Deviening and butterflying shrimp can take up to 30 minutes which is precious time when I'm in a hurry to get dinner on the table.

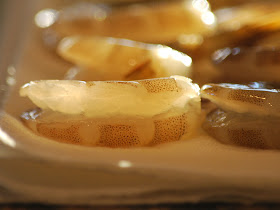
I adapted this recipe for Roasted Garlic Shrimp from the Jan/Feb 2013 Cook's Illustrated.  As usual, I needed to get dinner on the table in a hurry so the few extra pennies that I paid for the shrimp that had already been deviened and butterflied was WELL worth it.

Roasted Garlic Shrimp
1/4 cup salt
1 quart water
2 pounds shell on shrimp, butterflied
4 Tablespoons butter
6 cloves garlic
1/2 teaspoon red pepper flakes
1/4 teaspoon pepper
2 Tablespoons fresh parsley, minced

Dissolve salt in water and submerge shrimp in brine.  Cover and refrigerate 15 minutes.


Heat broiler to high.  Combine melted butter, oil, garlic, red pepper and pepper.


Remove shrimp from brine and pat dry on paper towels.


Add shrimp to garlic butter sauce along with parsley.


Arrange on a wire rack set in baking sheet.  (I put a cooling rack on top of a cookie sheet.)


 Broil shrimp 2 minutes on each side.


Toss shrimp into a serving bowl.


I served my shrimp with multigrain tortillas and sliced avocado.


These shrimp tacos were ready in under 30 minutes.  Everyone peeled their own shrimp at the table before making their tacos - making it even easier. 


If you're craving a super simple shrimp dinner, give this broiled shrimp technique a try. 

Ciao!


Wednesday, January 30, 2013

Fish Tagine


I got two new "toys" to add to my kitchen this Christmas - a tagine from my brother and a new cuisinart from my husband.  (Some girls collect new shoes - I collect kitchen appliances?!)  With the hustle and bustle of hosting Christmas this year, I didn't really get a chance to try out either of them until about a week after Christmas.  I would look at them on the back of the kitchen counter and start to dream of all the wonderful things that I could make in them - the anticipation was killing me.  Well, the day finally came and I decided to use both new gift to make fish tagine with preserved lemon and mint. The recipe came from the Easy Tagine cookbook that came with my tagine gift set.


For those of you unfamiliar with a tagine, it is a shallow, round, earthenware pot with a unique conical lid designed to lock in moisture and flavor.  The food is served straight from the cooking vessel or tipped into a more decorative tagine.  Classic tagine dishes include lamb with dried prunes, chicken with preserved lemons, duck with dates or fish and tomatoes.  The tagine is a fundamental feature of Moroccan cuisine.

Fish Tagine with Preserved Lemon and Mint
1 recipe for chermoula
2 pounds fresh fish filets, cut into pieces  (I used haddock)
2-3 Tablespoons oil
1 red onion, finely chopped
2 carrots, finely chopped
2 celery stalks, finely chopped
1 preserved lemon, finely chopped
14 ounce can diced tomatoes
2/3 cup water
2/3 cup white wine or sherry
sea salt and black pepper
fresh mint leaves

Make chermoula.  (See recipe below)  Reserve 2 teaspoons of mixture.  Toss fish chunks with remaining chermoula.  Cover and refrigerate 1-2 hours. 


Chop carrots, onion and celery.


Heat oil in tagine.  Stir in onion mixture.  Saute until soft. 


Chop preserved lemon in food processor.

   
Add chopped lemon with reserved 2 teaspoons chermoulade,  and tomatoes and stir in well.  Cook 10 minutes and reduce liquid.


Add water and sherry (or wine).  Bring to a boil, cover the tagine and reduce heat and simmer 10-15 minutes.  


Toss the fish in the tagine, cover and cook 6-8 minutes.  Season with salt and pepper.  


Sprinkle with fresh mint and serve immediately.


I served my fish with the couscous. (also included with my gift set)  It was really good.
 

Chermoula
2 cloves garlic
1 fresh red chili (I used dried because I couldn't find fresh.)
1 teaspoon sea salt
small bunch of fresh cilantro
pinch of saffron threads
1 teaspoon cumin
3 Tablespoons olive oil
freshly squeezed juice from 1 lemon

Chop garlic, salt and chili in food processor.


Add cilantro.


 Beat in the saffron, cumin, oil and lemon juice.


The tagine fish was a big hit.  It was REALLY good.  Flavorful and delicious and cooked perfectly.

Ciao!

Tuesday, January 29, 2013

Oreo Knock Offs


About 12 years ago, I came across a recipe for homemade Oreos and I decided to give them a try.  I can't seem to remember whether I thought that I could improve upon the original Oreo or if I thought it would be easier to make them than it would be to go to the store and buy them.  I did have 2 small children at the time so perhaps I just didn't WANT to go to the grocery store with the kids in tow.  My point is that for whatever reason I decided to try and duplicate original Oreo cookie in my own kitchen.  My homemade Oreo cookie was fairly successful - too successful actually.  I ended up with a cookie that fairly closely resembled an Oreo cookie - minus the grooves or the word "Oreo" stamped across the top.  The unfortunate part of my Oreo experiment was that I also cracked the secret to the cream filling in the center of the Oreo.  The cream filling in my cookies tasted so much like the original that I'm convinced that they have to use a similar combination of shortening and sugar to create their filling.  I was better off not knowing how much shortening is used in the filling of an Oreo to get it to the right consistency.  I actually haven't been able to eat an Oreo since my great homemade Oreo experiment, because I still can't get the image of all that shortening out of my mind.

When I saw these cookies in my new Thomas Keller cookbook, Oreos were the first thing that came to my mind.  Creamy, white filling sandwiched between two chocolate cookies - that says Oreo to me.  I read through the recipe only to find out that these cookies were created for Keller because he had a deep love of Oreo cookies.  I was intrigued by the recipe and I was pleased to see that the filling ingredients contained NO SHORTENING.  Keller calls these TKO cookies which stands for The Knock Out cookies.  I renamed them Oreo Knock Offs.

Oreo Knock Offs
White Chocolate Filling
4.4 ounces white chocolate
2 Tablespoons butter
1/2 cup + 1 teaspoon heavy cream

Chocolate Shortbread
1 3/4 cups + 1 1/2 Tablespoons flour
1 cup + 1 1/2 Tablespoons cocoa
3/8 teaspoon baking soda
16 Tablespoons butter
2 teaspoons kosher salt
3/4 cup + 1 Tablespoon sugar


Filling
Melt chocolate and butter in a double boiler.


Bring the cream to just below a simmer in a small saucepan.  Pour cream over chocolate and whisk until smooth.  Pour into a container and refrigerate at least 4 hours.


Shortbread
Place flour in a bowl. Sift in cocoa and baking soda.


Place butter in mixer bowl and beat until smooth.  Add salt and beat 15 seconds.


Add sugar and mix for 2 minutes.


Add dry ingredients in 2 additions.


Mound the dough onto a work surface and shape into a 6 inch square.  (It is VERY crumbly dough.)  Wrap in plastic wrap and refrigerate for at least 1 hour.


Unwrap dough and place between 2 pieces of parchment paper.  With a rolling pin, pound the top of the dough to flatten.


Roll out to 1/8 inch thick.


Cut rounds with a fluted cutter.


Arrange rounds on a cookie sheet and bake 15-17 minutes at 325.


Allow cookies to cool 5 minutes on trays then move to counter to cool completely.


Assembling cookies
Place filling in the bowl of mixer and beat until smooth.  Transfer filling to a pasty bag fitted with a small tip.


Turn half of the cookies upside down and pipe a small amount of filling onto each one.


Top each with a second cookie and press to sandwich.


The cream filling in these little Oreo knock off cookies is even better than the double stuff filling in an Oreo - if I do say so myself.  Try them for yourself and see.

Ciao!