Search recipes by category

Monday, December 31, 2012

Citrus Spritzers


Happy New Year's Eve friends!  I hope that you and your family are enjoying the very last day of 2012.  As for my family, we will be celebrating with some friends today but to be perfectly honest - it's a fairly short affair for me.  I rarely make it to midnight anymore before I'm sound asleep.  (I hate getting old.)  

If you're planning to crack open a bottle of champagne tonight to ring in the New Year, you may want to make a pitcher of my citrus spritzers to serve alongside your champagne.  They are easy to make but they will make your family or your guests feel extra special. 


Fresh Citrus Spritzers
1/3 cup sugar
1/3 cup water
juice of 1 orange
juice of 1 lemon
juice of 2 limes
ice
1 bottle seltzer water


In saucepan, combine water and sugar.  Bring to a simmer and stir until dissolved.  Cool.


Stir together sugar syrup, orange juice, lemon juice and lime juice.


Divide mixture among 4 glasses filled with ice. 


Top with sparkling water or seltzer. 


These spritzers were a huge hit with my family.  They loved the lemon lime flavor and I like that it didn't have nearly as much sugar as a can of soda.  No matter what you have to drink tonight, I hope that you celebrate the New Year in style.

Ciao!

Saturday, December 29, 2012

Chocolate Pistachio Biscotti


I got a text message from my brother last week as he was preparing to head to our house for Christmas.  He had obviously been looking through some of my blog posts because he put in a couple of special menu requests.  One was for gingerbread pancakes and the other was for biscotti.  When I asked him what flavor biscotti he wanted, he mentioned chocolate and he also suggested pistachio.  I decided I would combine the flavors into one delicious, nutty, chocolaty, crunchy biscotti.  Apparently, I wasn't the first person to think of this flavor combination because the web was full of chocolate pistachio recipes.  (Who knew?)  I borrowed this recipe from the browneyedbaker.com

Chocolate-Pistachio Biscotti
Yield: 4 dozen
Prep Time: 30 minutes
Cook Time: 20 to 24 minutes
Total Time: 1 hour 30 minutes

Ingredients:

2¼ cups all-purpose flour, plus more for dusting
¼ cup Dutch-process cocoa powder
1 teaspoon baking soda
1 teaspoon salt
12 ounces (about 2 cups) semisweet chocolate chunks (I used chocolate chips.)
1½ cups (about 8 ounces) pistachios, shelled
4 large whole eggs, plus 1 large egg white, lightly beaten
1½ cups granulated sugar
Sanding sugar (or granulated sugar), for sprinkling (optional)

Directions:

1. Preheat the oven to 350°F. Line a large baking sheet with a silpat baking sheet; set aside. In a food processor, pulse the flour, cocoa, baking soda, salt, 1 cup chocolate chunks, and pistachios until chips and pistachios are the size of peas.

 
2. In the bowl of an electric mixer fitted with the whisk attachment, beat the whole eggs and granulated sugar until the mixture holds a ribbon-like trail on the surface for a few seconds when you raise the whisk.


Switch to the paddle attachment. With mixer on low speed, add the flour mixture and remaining 1 cup chocolate chunks, and beat until just combined.


3. Turn out the dough onto a lightly floured work surface, and divide into three equal pieces. Shape each piece into an 18-inch log. Transfer to prepared baking sheet. With the palm of your hand, gently press the logs to flatten slightly. Brush egg white over logs. Sprinkle with sanding sugar, if using.

4. Bake, rotating pan halfway through, until logs are just firm to the touch, 20 to 24 minutes. Transfer sheet to a wire rack to cool slightly, about 20 minutes.


5. Place logs on a cutting board. Using a serrated knife, cut ¾-inch-thick slices on the diagonal.


Place a wire rack on a large rimmed baking sheet. Arrange slices, cut sides down, on the rack.


Bake until biscotti are firm to the touch and completely dry, 10 to 12 minutes. Remove pan from oven; let biscotti cool completely on the rack.


Biscotti can be kept in an airtight container at room temperature for up to 1 week.


The brown eyed baker did it again - the chocolate pistachio biscotti was delicious.  The hardest part of the whole recipe was saving it until my brother arrived. 


Ciao!

Friday, December 28, 2012

Baked Chicken Breasts with Vidalia Onion Sauce


2013 is quickly approaching.  Have you made any New Year's resolutions yet?  My resolutions are the typical ones that you hear often - eat better, exercise more and rest.  This recipe for Baked Chicken is perfect for anyone else out there who might also want to start eating healthier in 2013.


My teenagers scraped the onion sauce off of the chicken before they ate it but Ben and I really enjoyed the nice flavor that the onion sauce added to the chicken.

Ciao!

Thursday, December 27, 2012

Grilled Pork Loin


It seems that everyone is hosting parties this time of year and chances are, sooner or later, you will be expected to host a dinner party of your own.  If you're looking for an easy meal to serve to your guests, give this one some serious consideration.  It's simple and delicious and it will impress even your most discriminating your dinner guests.

Lydia's Best Herb and Garlic Pork
1/4 cup olive oil
6 cloves garlic
2 Tablespoons fresh basil
2 Tablespoons fresh chives
2 teaspoons chili powder
1 teaspoon fresh oregano
1 teaspoon salt
1/2 teaspoon pepper
3-4 pound pork loin

Combine all ingredients, except pork.
 
 
Place meat in a large plastic bag.  Pour marinade over meat.  Refrigerate 2-24 hours.
 
 
Remove meat from bag. 


Grill to an internal temperature of 155.  


Cover an let rest until meat reaches 160.  The temperature of the meat really will continue to rise another 5 degrees as it rests. 


I served my pork loin with fresh green beans, a whole wheat roll, applesauce and a salad.  
 

If you don't have a Big Green Egg - never fear - you can bake it in the oven just as simply.  Make sure that you use a meat thermometer though because it's easy to overcook a pork roast.

Ciao!

Wednesday, December 26, 2012

Pink Peppermint Ice Cream


I found out recently that my mom AND my mother in law share a love of peppermint ice cream.  I don't really know why it's taken me so long to figure out that they had this in common.  (Not sure whether you could call it a direct genetic link but it's worth noting that my daughter and I also love peppermint ice cream.)  Now that I know that we all share this peppermint ice cream love I just HAD to make a batch - to bond us.  Can you think of a better reason to make peppermint ice cream?

I've never actually made homemade peppermint ice cream so I turned to the internet for inspiration.  (and a recipe)  I found a recipe for pink peppermint ice cream on amandascookin.com that looked absolutely scrumptious. Of course, I had to put my own little twist on the original recipe and make it my own.  I divided my ice cream into thirds and added a different form of peppermint to each batch.


I put crushed candy canes in one batch,


soft peppermint sticks crushed up in another,


and Andes peppermint crunch in the last batch.


Peppermint Ice Cream
14 ounce can condensed milk
2 cups heavy cream
1 cup 2% milk
1/2 teaspoon peppermint
4 1/2 teaspoons vanilla
pink food coloring
1 cup crushed peppermint candies of your choice

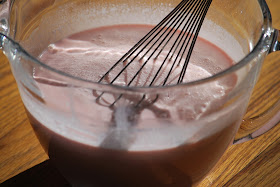
Combine all ingredients except peppermint candies.


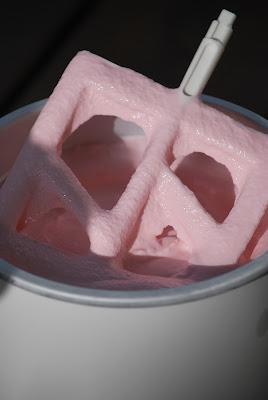
Pour into an ice cream freezer and process until firm. 


Stir in peppermint candies.

This was the ice cream with the crushed candy canes,  


 the soft peppermint sticks,


 and the Andes peppermint crunch.


What a great experiment.  Could four different women from the same family who share a love of peppermint ice cream, like the same kind of peppermint added to their ice cream?  The truth is that we didn't dislike any one of the peppermint ice creams.  They were all good and I would recommend that you try all of them.  See for yourself which version of peppermint ice cream you like the best.

Ciao!