Monday, April 30, 2012

Reese's Cupcakes


If you're a fan of Reese's Peanut Butter Cups - you will love these cupcakes.  (They're also a great excuse to buy a bag of these Reese's Minis.)


I found this recipe on a website called hoosierhomemade.com.  She has tons of great cupcake recipes and decorating ideas.  These were called "leftover Halloween candy cupcakes" and since my daughter is a fan of Reese's peanut butter cups, we decided to whip up a batch for her school party.  Needless to say - they were a big hit.


We had to gather up our ingredients and get these cupcakes made quickly because the peanut butter cups started disappearing as soon as we opened the bag.


We started by making a batch of our favorite devils food cupcakes.  You can follow my recipe or use your own favorite chocolate cupcake recipe.

Devil's Food Cupcakes
1 cup flour
1/4 cup cocoa
3/4 teaspoons baking soda
1/2 cup sugar
1/3 cup brown sugar
4 Tablespoons butter
1 egg
1 teaspoon vanilla
1/2 cup lukewarm water
1/4 cup buttermilk

Stir together flour, cocoa, baking soda and salt.  Combine water and buttermilk.  In bowl of mixer, combine sugar, brown sugar and butter.  Beat until light and fluffy.  Add egg and vanilla.  Add flour mixture, alternating with water mixture.  Scoop into 12 paper lined muffin tins.  Bake 18 minutes at 350.


The cupcakes baked up beautifully. We put them on a rack to cool while we made our peanut butter frosting.


Peanut Butter Frosting
1/2 cup butter
1 cup peanut butter
3 Tablespoons milk
2 1/2 cups powdered sugar

Cream butter and Peanut Butter until fluffy.Gradually add powdered sugar, alternating with a little milk at a time.  Beat well, until desired consistency.


We she started out mixing the frosting by hand and after it got too hard to mix, she put it on the mixer.


This is what the frosting looked like when we finished mixing.  (A little thick - don't you think?)  Actually I made it this way to show you what the frosting looks like when you forget to add the milk.  (Do you believe that?) 


This is what the frosting is supposed to look like.  (After you add the milk.)


While we waited for the cupcakes to cool, my sweet baker even did the dishes!  She's so awesome.


When the cupcakes were cool, and the dishes were done, we frosted the cupcakes and added a mini Reese's peanut butter cup to the top of each one.


Ciao!

Saturday, April 28, 2012

Lasagna on a stick


I had lasagna ruffles last week on the menu when a change in the baseball schedule threw a kink into my plans.  (Ahhh the joys of being a baseball parent.)  I decided to thread the lasagna onto skewers and take them to the game instead of ditching the whole meal plan altogether. 


I placed the skewers of ruffles on a baking sheet. 

 
It was a genius idea but the execution was a little more difficult than I expected because I couldn't find a proper container that would hold these sharp, pointy skewers with hot lasagna.  It all worked out in the end because as I was finishing my lasagna skewers, the baseball schedule changed yet again.  With my patience and flexibility pushed to the limit, I scrapped the idea of trying to take dinner to the field and decided to eat it at home, after the game.


It was about 10:30 when we finally got back home that night.   I baked the ruffles and fed them to two hungry teenagers who really didn't mind eating dinner so late.  I served the lasagna with a side of marinara sauce for dipping. 


I still like the idea of taking lasagna ruffles on a picnic but I haven't quite figured out the best way to transport them yet.  Let me know if you have any suggestions.

Ciao!


Friday, April 27, 2012

Pepperoni Bread


I hope that you're not tired of me posting about all of the meals that we eat "on the go".  With soccer and baseball seasons officially ending this week we should be eating more meals at home next month. 

 
I packed another picnic to take to the field last week - this time it was pepperoni rolls and calzones.  This recipe came out of my Cook's Country magazine.  I've experimented with pepperoni bread recipes but never really had great results so I thought this recipe might be just what I needed to get me on the right track to pepperoni greatness.  

Pepperoni Rolls  (I made a 1/2 recipe)

4 sticks pepperoni 
1 1/2 cups water
1 cup whole milk
2 Tablespoons + 2 teaspoons sugar
6 2/3 cups flour
1 Tablespoon yeast
2 teaspoons salt
1 egg
4 teaspoon sesame seeds


Cut pepperoni sticks in half.  Cut each half in quarters.  Slice each quarter into 4 wedges.  (You will have 64 wedges.)  I used mini sticks so I didn't have to cut my pepperoni.


Place pepperoni in a large bowl and microwave for 3 minutes.   Reserve oil.


Combine water, milk and sugar.  Add 3 Tablespoons pepperoni oil.


Combine flour, yeast and salt in mixing bowl.


Add water mixture and knead with dough hook about 8 minutes.  Move dough to a greased bowl, cover with plastic wrap and let rise for 1 hour.

 
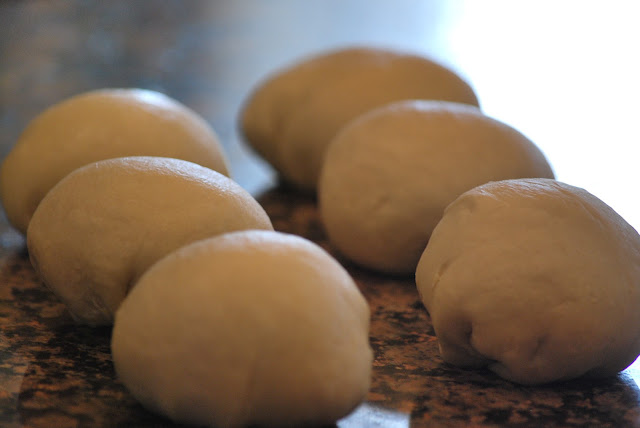
Transfer dough to counter and divide into 16 pieces.  Shape each piece into a ball.  Let rest 5 minutes.

 
Toss pepperoni with 1 Tablespoon flour.  Roll each piece of dough into a 4x6 inch rectangle.  Lay 4 pieces of pepperoni along dough.

 
Roll into a tight cylinder.  Cover with plastic wrap and let rise for 1 hour.


Combine egg and 1 teaspoon of water and brush over rolls.  Sprinkle with sesame seeds.


Bake 24 minutes at 375. 


I drastically underestimated the amount of pepperoni that I would need for these rolls so I turned the rest of my dough into meatball calzones.   I'm not really sure which one my family preferred, pepperoni rolls or meatball calzones.  Both were delicious and both were gone by the end of the game.  


Ciao!

Thursday, April 26, 2012

Homemade Strawberry Freezer Jam


I've already made a half dozen trips to the strawberry farm this month.  I just cant' seem to get enough of the juicy red fruit.  This week, I turned some of my berries into Strawberry Jam.  I opted for a simple freezer jam.  It took less than 30 minutes to make 5 jars of jam!


I started by buying freezer jars and pectin at my local Wal Mart store.  I also picked up some super cute labels for my homemade jam.


The jam making process was simple.  I washed the berries, took off the stems and them sliced them in half.


I put them into my food processor and pulsed them.


I ended up with about 3 1/2 cups of pureed fruit.  I stirred together 1 1/4 cups of sugar and 2 packets of instant pectin and then added it to the fruit.  


I stirred the fruit mixture for 2 minutes and voila - jam.   Each recipe was supposed to fill 2 half pint jars but I doubled the recipe and filled 4 3/4 jars. 


The jam will keep in the refrigerator for 30 days and last up to a year in the freezer. 
Do you want to know what I ate with my homemade strawberry jam first?


Homemade English Muffin Bread!  Check out that recipe on yesterday's blog.

It may be strawberry season now but check out the blueberries on the bushes in my backyard.


It won't be long before we're picking blueberries!

Ciao!